Today, I am writing about toxins in nail polish, an issue I care about deeply. Many of you may not be aware that when polishing your nails, you may be exposing yourself to chemicals that have the potential to cause cancer and birth defects. Specifically, a chemical combination called the "Toxic Trio": Toluene, Dibutyl Phthalate (DBP) and Formaldehyde. Below, I will be talking about why each chemical is unhealthy.
Toluene
Toluene is most commonly found in petroleum crude oil. It is also found in some aerosol sprays, antifreeze, adhesives, printer ink, and cosmetics. Toluene exposure occurs when it is inhaled or absorbed through skin. It could also be ingested through contaminated food or water.
Effects on your body:
Most information we have about toluene exposure is from studies about inhalant abusers, or "huffers". Inhalants contain many other chemicals, and therefore the information is not specific to toluene. Inhalants can cause problems with the central nervous system. This may result in symptoms such as dizziness, headaches, and confusion. Over long periods of time, exposure to high levels of the chemicals found in inhalants can cause permanent brain damage, kidney failure, liver failure, and even death. Toluene by itself can be a skin irritant causing redness and itching. No studies have shown that exposure to toluene causes cancer.
Exposure during pregnancy:
There is no data available about only exposure to toluene during pregnancy. Much of the data about possible effects of toluene exposure during pregnancy is from studies about people who abused inhalants, or "huffers". Therefore, this data is not just about toluene, since aerosolized sprays obviously contain other chemicals. Those studies have shown that exposure to aerosolized chemicals may cause birth defects such as mental retardation, decreased birth weight, delayed growth, behavioral delays and hearing loss. Animal studies on the effects of toluene have shown decreased birth weight, delayed growth and hearing loss.
Dibutyl Phthalate (DBP)
Dibutyl Phthalate is used to make plastics soft and flexable. It is found in many plastics such as shower curtains, food wraps, bowls, and of course nail polishes and cosmetics. It has no scent. Exposure can occur through inhalation or oral exposure.
Effects on your body:
The effects of DBP on humans are relatively unknown because there have been no studies on the direct effects of inhaled or oral DBP in humans. Some studies on animals have shown liver problems, reduced weight, and anemia. The Environmental Protection Agency (EPA) considers DBP unclassifiable as to carcinogenic effects. This means that because there are no studies on this chemical, they cannot say whether or not it is proven to cause cancer.
Exposure during pregnancy:
Again, no studies have been conducted on humans, therefore data available about possible effects is limited to data observed in animal studies. Animal studies have shown decreased birth weight, decreased numbers of viable births (meaning the animal died in the womb secondary), neural tube defects, decreased size of testicles, and decreased production of sperm.
Formaldehyde
Formaldehyde is a strong scented clear gas which can be mixed with alcohol to create a liquid. It is frequently used as a preservative, and I am sure many of you can remember the scent from anatomy classes. Formaldehyde is contained in many common building materials such as particle board and insulation. It is also found in some cosmetics, paper products, plastics, dyes, and cigarettes.
Effects on your body:
Formaldehyde inhalation can cause difficulty breathing, watery eyes, and irritation of the nose and throat. Ingesting formaldehyde can cause vomiting, abdominal pain and diarrhea. Skin contact can cause irritation and rashes. Formaldehyde exposure has been proven to cause nasal cancers in animal studies, and therefore is considered "probably carcinogenic" to humans. There have been no human studies on whether or not formaldehyde will cause cancer in humans because they are too dangerous to conduct knowing that it is known to cause cancer in animals.
Effects during pregnancy:
There is no evidence that Formaldehyde causes birth defects. There is some debate as to whether exposure during pregnancy causes increased risk of spontaneous abortion and reduced fertility. There is also debate as to whether exposure causes decreased sperm concentrations.
Now, before you freak out and decide you are never going to polish your nails again, there is good news! Many nail polish and cosmetic companies are aware of the unhealthy chemicals used in cosmetics, and are now manufacturing their products without toluene, DBP and formaldehyde. If polishes do not include these products, they are known as "3-free". There are also products which do not include formaldehyde resin, known as "4-free", and products that do not contain formaldehyde resin or camphor, known as "5-free" Also, there is a small group of companies that manufacture water based nail lacquer. I am working on a list of nail polishes that are in each of these categories. Check my next post for a list of safe polishes.
Are you scared to polish your nails now? Would you still polish your nails while pregnant after reading this? Do you think the government should make it illegal have these products in polishes and other cosmetics? Let me know in the comments!
Sources:
Environmental Protection Agency
Environmental Protection Agency, DBP
Environmental Protection Agency, Formaldehyde
Canadian Center for Occupational Health and Safety
Illinois Dept. of Public Health
Thursday, July 26, 2012
Tuesday, July 24, 2012
The Polish Well contest!
Hello everyone!
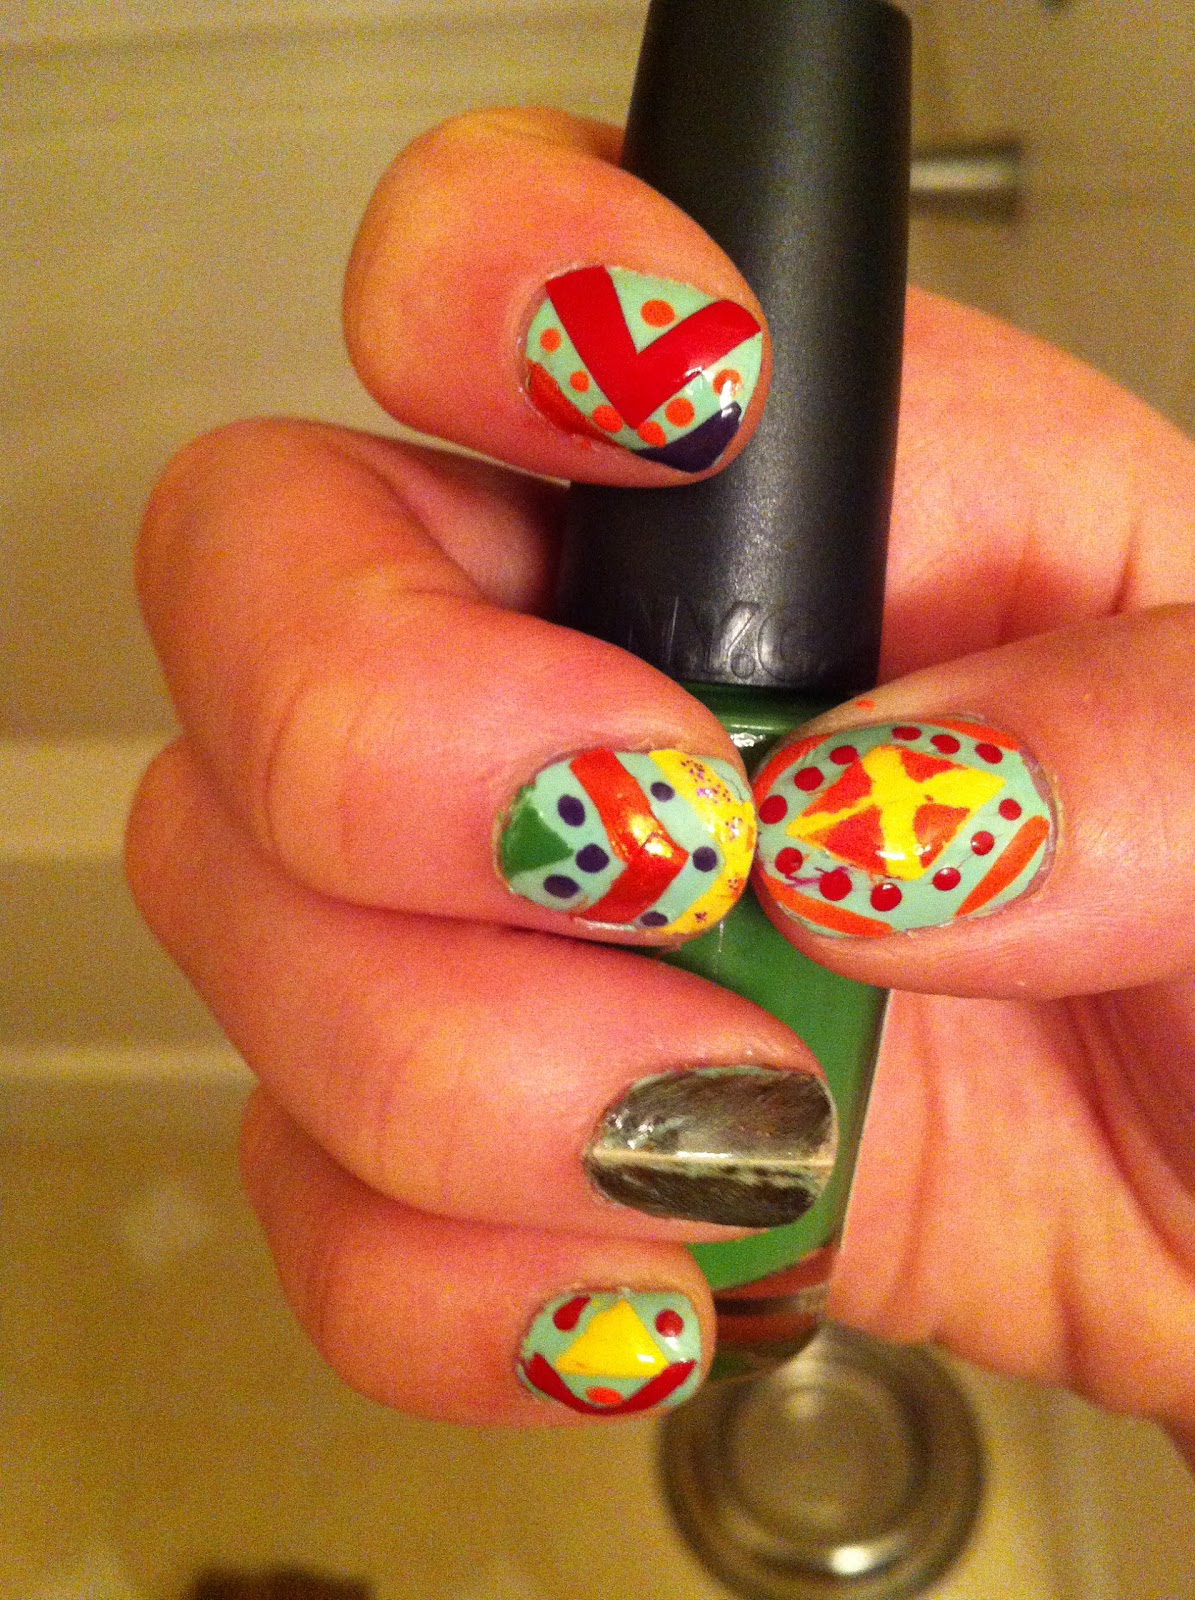
The Polish Well is a blog that I love to read! They are hosting a contest to win some polishes so I wanted to show you my entry. The theme of the contest is "Fashion" and your nail art is supposed to reflect your favorite fashions that inspire you, whether it be print, pattern, or color.
So, what fashion was I digging this summer? The bright and bold prints and colors in Macys "Journey to Brazil" collection, thats what.

Below is my nail art inspired by this theme.


What do you think? Head over to The Polish Well to take a look at the other contest entries and head over to Facebook on August 2nd to vote!
Sunday, July 22, 2012
Updated review on Essie Poppy Razzi "Action"
My mom and dad came down yesterday to visit and go see my brothers band, Angus and the Attiks play last night. The band did an amazing job as usual, and you should all go see their next show at Wicked Pissa (formerly Legends Rock Bar) in Gales Ferry, CT on Sat. Aug. 4th 9:30PM. Anyway, my mom asked me to paint her nails for her before the show, and she picked out Essie "Acton" which I reviewed earlier in the week. I thought this would be the perfect time to try this polish with a white base coat like I mentioned in my previous post. The results were much better!

I used Revlon Quick Dry Base coat, and then two coats of Sinful Colors "Snow me White". After that, I applied two coats of Essie "Action" and Revlon Quick Dry Top Coat. The white underneath the Essie shade really seems to bring out the neon in the polish, and it really looks much more like a neon highlighter, which is what this shade looks like in the bottle. I just wish that Essie had added something to the color to make it more opaque to begin with so that the white undercoat wasn't necessary. With the white underneath, this is a shade that I will probably wear more often.
What do you think? Do you like this shade better with or without the white base coat? Would you wear either one?

I used Revlon Quick Dry Base coat, and then two coats of Sinful Colors "Snow me White". After that, I applied two coats of Essie "Action" and Revlon Quick Dry Top Coat. The white underneath the Essie shade really seems to bring out the neon in the polish, and it really looks much more like a neon highlighter, which is what this shade looks like in the bottle. I just wish that Essie had added something to the color to make it more opaque to begin with so that the white undercoat wasn't necessary. With the white underneath, this is a shade that I will probably wear more often.

What do you think? Do you like this shade better with or without the white base coat? Would you wear either one?
Saturday, July 21, 2012
Leopard Nail Art Tutorial
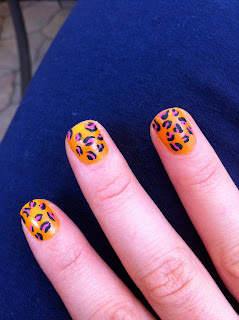
Well, I was so disappointed with how sheer Essie "Action" came out, I felt the need to do something to save this manicure. I decided that some bright leopard spots would be just the cure. These are super easy and super cute! See below for the tutorial.

1. Start with a base color of your choosing. When it is dry, take some of your acrylic paint, and paint little dots or c shapes on your nails. I used pink. I suppose you could use a nail art brush and some polish instead, but it will take longer to dry, and you will have a little less control over the paint than with the acrylics.

2. Next, take some black acrylic paint and paint little c shapes around the pink spots. For some of these I did c shapes on both sides, and for some I did a c shape along the bigger c and a dot on the others.
3. If you feel that you don't have enough spots, you can go in and add a few random spots with just black.
Thats it! So simple, and such a cute way to spruce up a boring manicure, right? Do you think you will try this?

Friday, July 20, 2012
Review: Essie "Poppy Razzi" Collection - Action
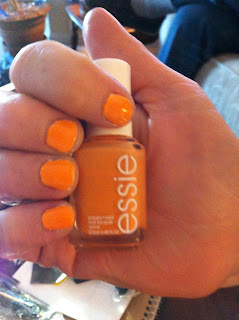
Essie put out a neon summer collection called "Poppy Razzi" which contains 4 awesome summer neon hues. This collection is out in drug stores right now.
I picked up a shade entitled "Action" at CVS which I was very excited about! It is full of neon tangerine goodness.


I picked up a shade entitled "Action" at CVS which I was very excited about! It is full of neon tangerine goodness.

Although I was excited about this shade initially, I was not impressed after I put on the first coat. It came out streaky and sheer. You could totally see my smile line, and also the few areas on my nails that area pealing a little.

Yuck! look at how sheer this is! You can absolutely see any imperfections your nails may have.
After the second coat, you could still see the smile line, plus it started to bubble a little. This could be because I was applying the color outside and it was hot out. I will talk in a later post about how to stop bubbles in your polish. Anyways, It took three coats to make this polish to look decent.

As with most neon shades, this polish dries matte. A top coat is a must to get the full potential out of this nail color! Overall, I was disappointed with the sheerness of this formula. I read some other blog posts that mentioned they used a white polish underneath and loved how the color came out. I would try this polish again with a white base first, but if that doesn't work out I can't see myself wearing this very often. Even though I love the color, this polish is just too sheer.
Has anyone else tried the other polishes from the "Poppy Razzi" Summer 2012 collection? What are your thoughts?
Thursday, July 19, 2012
How to make your own nail art decals
Hello!
My spree of overnight shifts is over! This means that I finally have time for some nail art again. Today I am going to show you how to make some cool nail art decals. This is perfect if you want to make some geometric designs on your nails but don't have a steady hand.

So, read below for how to make your own nail art decals.
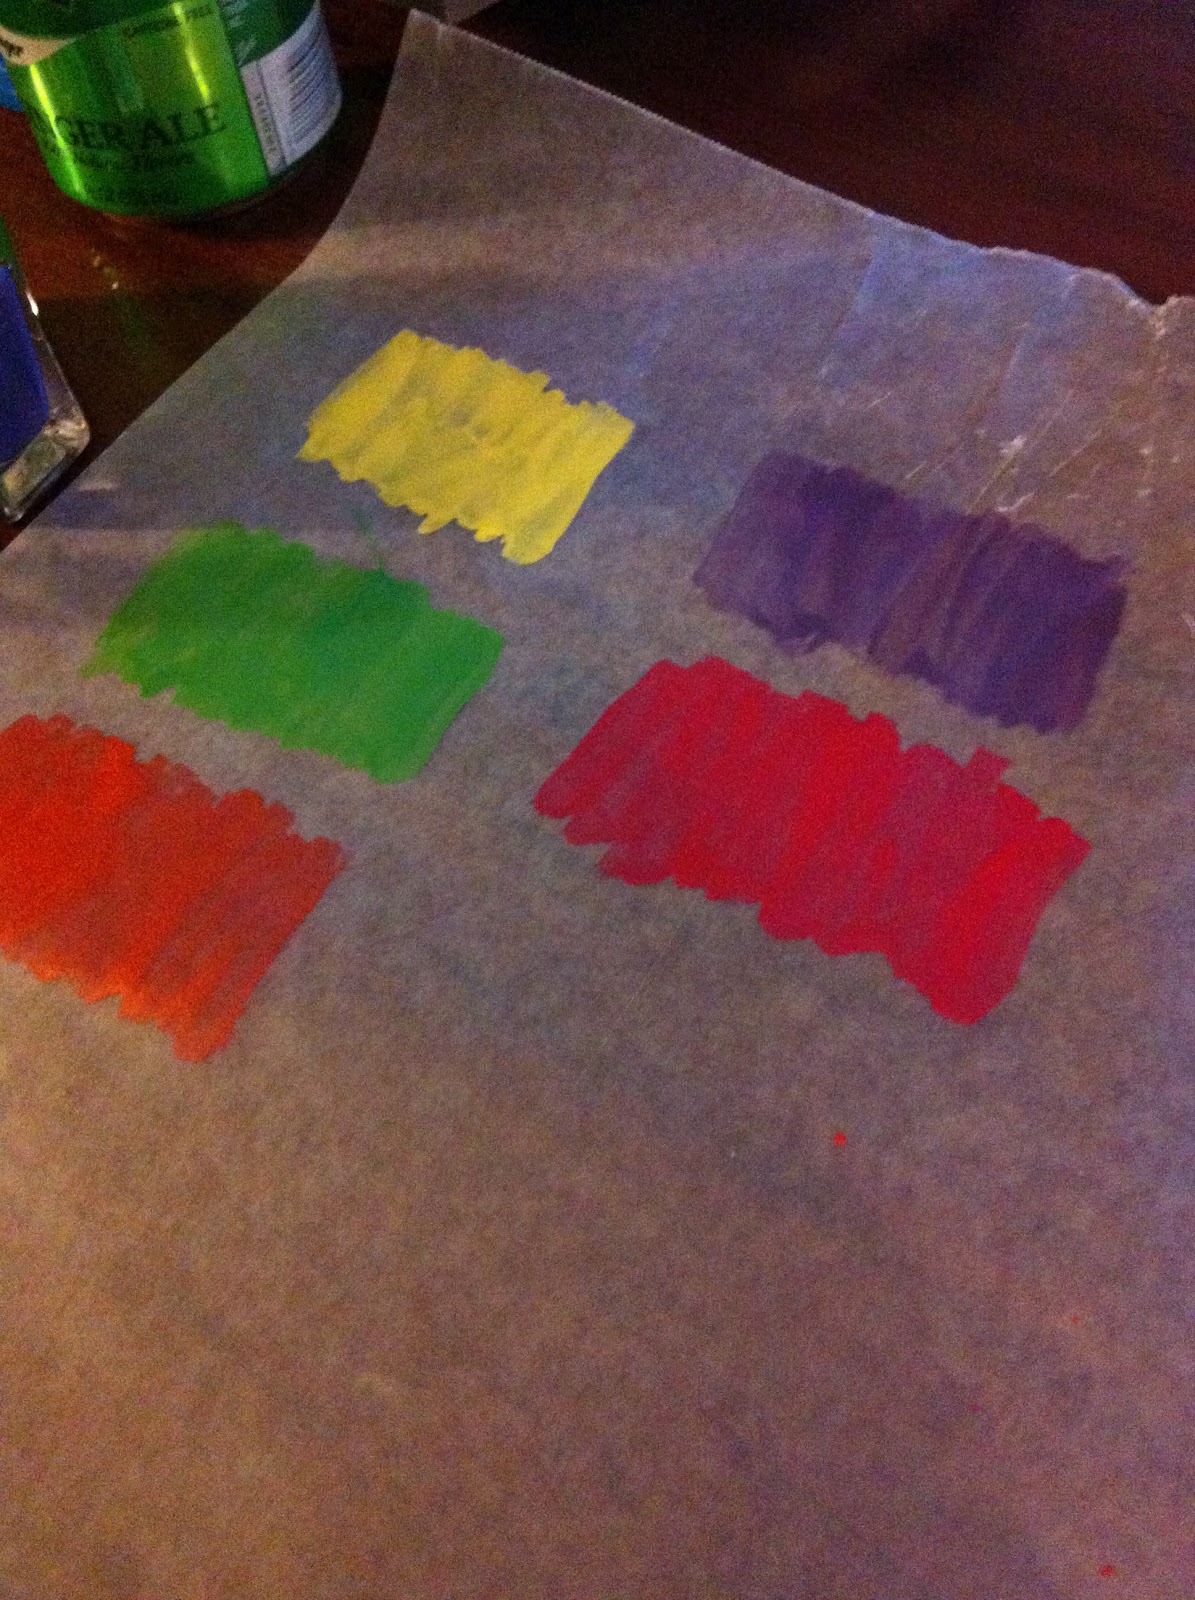
1. Start with a sheet of wax or parchment paper. Choose your nail colors. Paint each color in thin layers on the paper.

2. Wait for color to dry, continue to paint more thin layers. I painted about 5. If you paint too few, it won't come off of the paper correctly. Painting several layers of polish will also make the colors opaque so that you will be able to apply them to a darker color base polish.
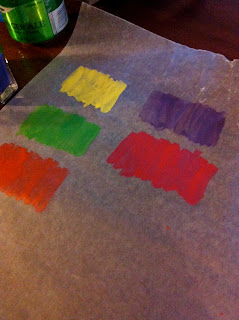
3. Wait for the colors to dry completely. I waited overnight.
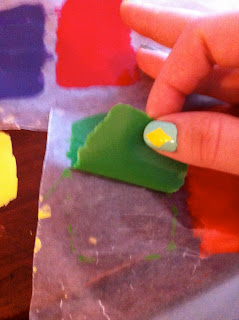
4. Gently peal polish off of paper.

6. Use nail scissors to cut to proper shape on nail.
7. Finish off with top coat over decals. I used Seche Vite top coat for this because it is thicker, so will cover up any bumpy-ness from the nail decals.

My spree of overnight shifts is over! This means that I finally have time for some nail art again. Today I am going to show you how to make some cool nail art decals. This is perfect if you want to make some geometric designs on your nails but don't have a steady hand.
My manicure with nail art decals
So, read below for how to make your own nail art decals.
1. Start with a sheet of wax or parchment paper. Choose your nail colors. Paint each color in thin layers on the paper.

2. Wait for color to dry, continue to paint more thin layers. I painted about 5. If you paint too few, it won't come off of the paper correctly. Painting several layers of polish will also make the colors opaque so that you will be able to apply them to a darker color base polish.
3. Wait for the colors to dry completely. I waited overnight.
4. Gently peal polish off of paper.
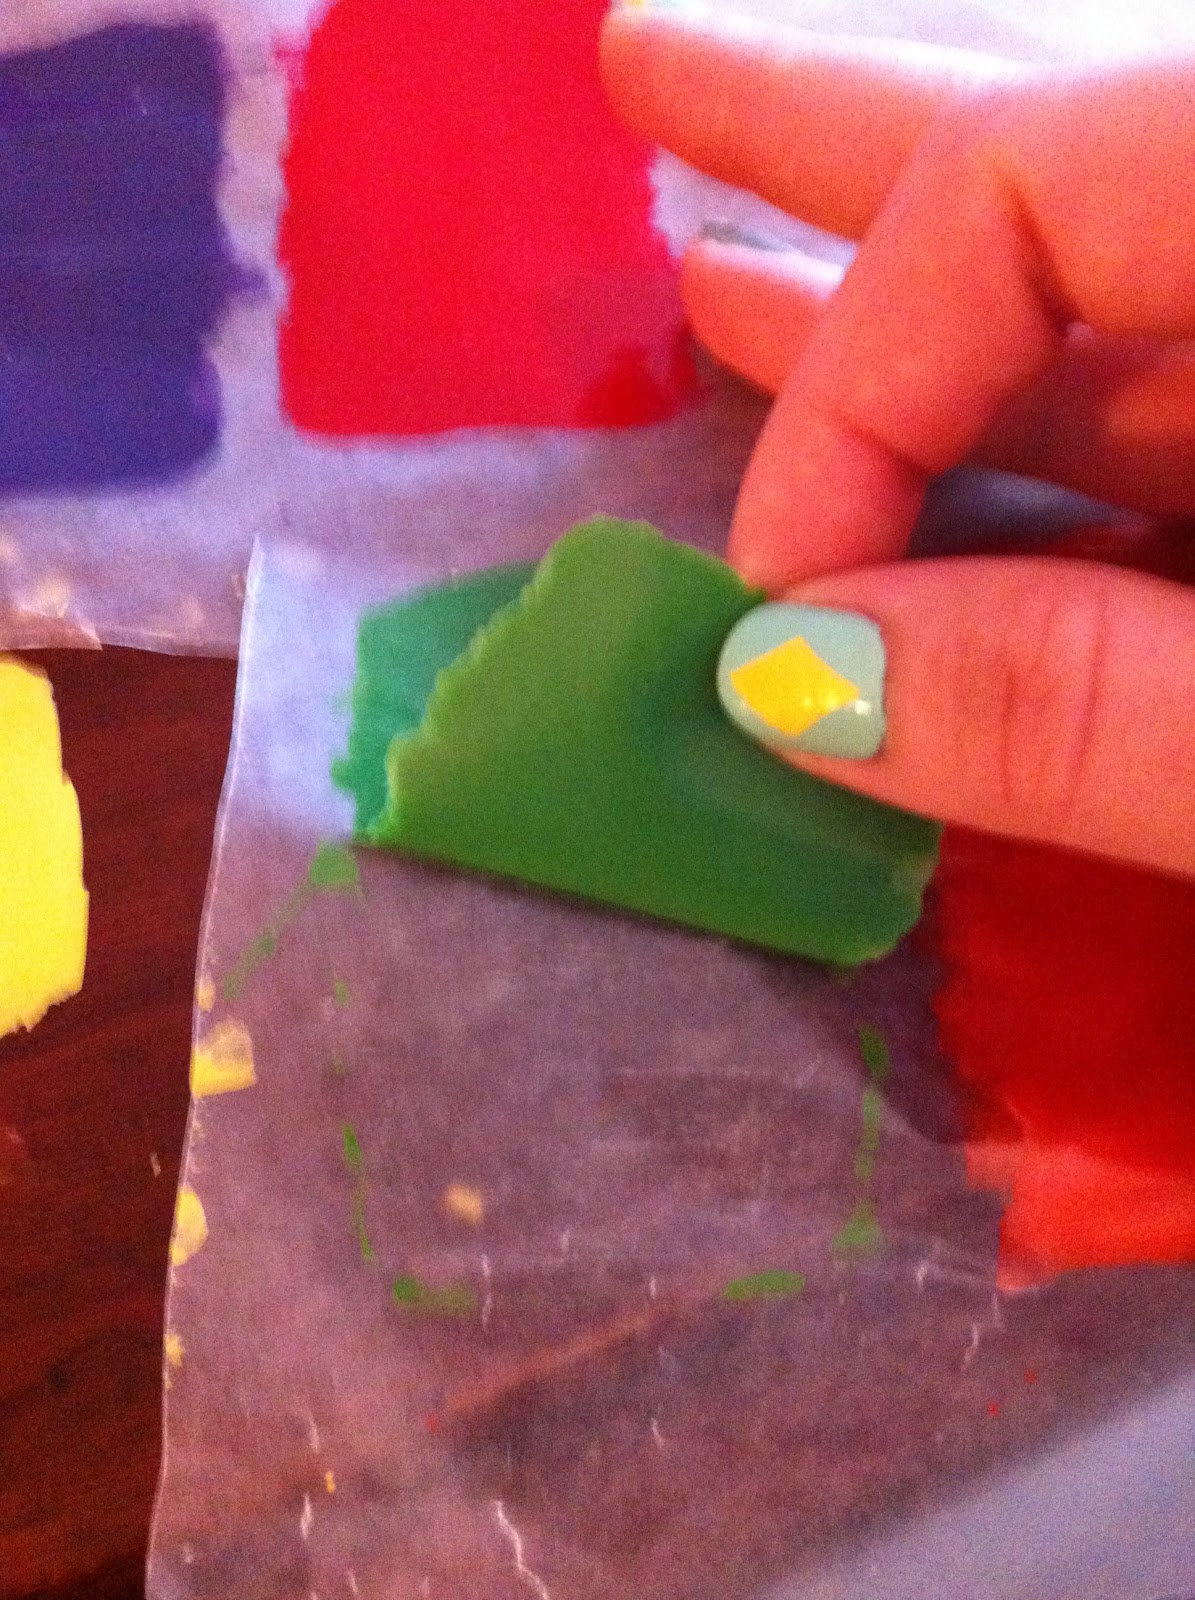
5. Cut into whatever shapes you want. Then, take thin paintbrush and apply clear top coat to back of decal and stick on nail.

6. Use nail scissors to cut to proper shape on nail.
7. Finish off with top coat over decals. I used Seche Vite top coat for this because it is thicker, so will cover up any bumpy-ness from the nail decals.

There you go! That is how I make some neat decals. I used the dotting tool to create some extra dots on this nail after I applied the decals. What do you think? Will you try this look?
Monday, July 16, 2012
Review: Maybelline Color show
Hello everyone!
 Sorry for the lack of posts the last few days. I have been working the overnight shift, and it takes me a while to adjust, so the only thing I have been doing is sleeping and working. I am working on something really cool for you all though. I am going to post it in several parts, since it is kind of complex. Today, I am reviewing a new line of polishes by Maybelline. The line is called Color Show polish and it contains 40 different shades "Inspired by the Catwalk". This color called "Green with envy and is a creme mint green. The formula is smooth. It dries streak free after two coats. No clue about the wear yet, as I just put it on. I will update you in a few days. Overall, I think this color is very unique, and on point with summer fashion.


Thursday, July 12, 2012
Blueberry Jam nail
Today I went to my parents house to make jam with my mom. We made blueberry and raspberry flavors. It looks delicious and I can't wait to eat it tomorrow for breakfast. My manicure was inspired by our blueberry jam. Enjoy!

Blueberries on the vine!
The next part is the secret to doing this manicure. Instead of nail polish for the design, I actually used acrylic paint. Thats right, regular acrylic paint like you can buy in the craft store. It is safe and non-toxic. If you mess up, just wash your hands with soap and water and it comes right off! Cool right? It is actually much more opaque than regular nail polish so you only have to do one coat. It is also a lot more firm, so it will not run while you use it .

My cheepo acrylic paints that I bought at the craft store for $4
I started off by making the dark blue dots for the blueberries. I used the end of the paintbrush without bristles, and just dipped it in the darker blue paint then pushed it against the nail with different pressures to make circles of different sizes. I used the paintbrush end because my dotting tool didn't make the circles as big as I wanted them. Next, I made a smaller light blue dot inside each darker blue one.

After that, I painted the vines. I used the darker brown paint and put some accents in with the lighter paint. Then, I used green to paint some leaves.

I used the blueberry thumb as an accent nail, and painted the other nails with Sur La Pointe Des Pedis Tip Toe polish in Navy. I got this in Old Navy last year. I think it is from the Sara Jessica Parker line. It looks black in the pictures but it is actually a really beautiful navy color. It also has great application with full coverage color in just one coat.

I also painted my moms nails for her!

The color is Revlon Teak Rose. As usual, I used Revlon Quick Dry top and base coat.
Tuesday, July 10, 2012
Paint Drip Manicure


Hey everyone!
My my nail art design today was inspired by an awesome video tutorial from Juliatmll on youtube!
Click below to watch. Above is my finished manicure. Below are some other helpful hints on how to create this on your own.
1. If you read my post yesterday, I am sure that you saw the ugly white polish after one coat. It looked pretty streaky, but much better after two. Even though there were still a few streaks, I didn't paint a third white coat, because I knew I was going to paint the drips on top and I didn't want to make the polish too thick. After I applied the colored polish, the few white streaks were not noticeable.
2. I used a nail dotting tool for the bottom of the drops. You can see what mine looks in the picture below. It has a nail art brush on one end, and the dotting tool on the other. If you don't want to buy one, you can just use a pin head or bobby pin. I got my dotting tool at Sally's Beauty Supply. It was only a few dollars.


3. To draw the lines, I actually used a thin paintbrush which I got from the craft store. It is meant for acrylics. It is long and thin, and i found that this kind of brush was easier to make straight lines with than the shorter brush on the end of my dotting tool.

For this manicure, I used Orly French Tip in Softest White, Cover Girl Boundless Color in Candy Apple, Kiss Nail art paint in Beach Yellow, NYC In a Minute Quick Dry in East Village, and NYC In a Minute Quick Dry in High Line Green. As usual, I used Revlon quick dry base and top coat.
On another note, the first finger I painted was the red thumbs. I think it looks like dripping blood. Maybe I will use part of this for a halloween manicure. Do you think it would creep out my patients?

Monday, July 9, 2012
How to get a perfect, long lasting manicure
Hello everyone!
Ever wonder why some people can wear the same nail polish for a week without chipping, yet yours seems to chip after one day? Well, some of that is genetics (stronger nails = less bending and less splitting, therefore less chipping) however some of it may have to do with the technique you use to paint your nails. Lets talk about how to get a beautiful manicure every time you paint your nails!
The first step to getting a beautiful manicure is prepping your nails! If you already have nail polish on, you obviously need to take it off. I like to use non-acetone polish remover whenever possible, because it is less drying. Cotton balls are the best way to take off nail polish because they do not break and flake off and make a big mess like tissue paper. If you have nail polish stuck around the edges, you should use a q-tip to remove that as well.
After my polish is removed, I always wash my hands quickly. Pretty much everyone who knows me has probably heard my rant about microwaving plastic tupperware and how I don't like to store my food in it. I am worried about getting cancer from the toxins that plastics leak into your food (I get this phobia from my mom, THANKS MOM) Same goes with nail polish remover. Wash those toxins off as quickly as possible! However, do not soak your hands in the water for a long period of time. Water makes your nails swell. When they are dry again, they will shrink. If you put the nail polish on while they are still even a tad bit wet, they will chip when dry. I usually wait about 5 min. after washing my hands to start applying new polish so that it gives my nails some time to dry.
If necessary, this is the time to use that great Sally Hansen cuticle remover that I talked about in my last post to soften up those cuticles and push them back. After I have waited for my nails to dry off, I then apply a base coat. This is where we get into the nitty gritty of nail polish application. Starting in the middle of your nail, do one smooth stroke then two on the sides. Come as close to the cuticle as possible without touching it. If you get nail polish under the cuticle it looks bad, and as your nail grows out, it may create some flaking near this line.

If you do this by accident, you can take a thin paintbrush or nail art brush, dip it in polish remover and then run it along the edge of the nail where you made the mistake. This will remove it. It is best to do this right away while the polish is still wet.

When you have painted your whole nail, don't forget to cap the ends. For those of you who do not know what this is, look at the picture below. Basically, you take your brush, and run it along nail edge. This will seal off the edge, helping to prevent chips and tip wear. Remember to always use very thin coats of polish. Too thick polish takes forever to dry making you more likely to ruin the manicure you worked so hard to create by touching things and smudging it.

Next, move on to your color coat. Same process here. Thin coats, cap the ends. Don't touch the polish brush directly to your cuticle. I usually only do 2 coats of color, unless the color is too translucent and I am trying to cover up streaking. If the polish gets too thick, it is going to peal right off. Do the same steps with the top coat. One thin coat, cap the ends. Top coat is essential to make your manicure shiny, cover up any unevenness in the color, and to make it last longer. If there are any mistakes you can again use that thin paintbrush to get excess polish off your skin. Make sure you wait for all polish to dry between coats, usually about 10-15 min so that your manicure doesn't get ruined when you touch things.
When you are done, remember to wash your your hands again. Then use some moisturizer, like cuticle oil, or that great J.R. Watkins hand and cuticle salve that I talked about in my last blog.
Does anyone else have any tips or tricks to make your manicures last longer?
Ever wonder why some people can wear the same nail polish for a week without chipping, yet yours seems to chip after one day? Well, some of that is genetics (stronger nails = less bending and less splitting, therefore less chipping) however some of it may have to do with the technique you use to paint your nails. Lets talk about how to get a beautiful manicure every time you paint your nails!
The first step to getting a beautiful manicure is prepping your nails! If you already have nail polish on, you obviously need to take it off. I like to use non-acetone polish remover whenever possible, because it is less drying. Cotton balls are the best way to take off nail polish because they do not break and flake off and make a big mess like tissue paper. If you have nail polish stuck around the edges, you should use a q-tip to remove that as well.
After my polish is removed, I always wash my hands quickly. Pretty much everyone who knows me has probably heard my rant about microwaving plastic tupperware and how I don't like to store my food in it. I am worried about getting cancer from the toxins that plastics leak into your food (I get this phobia from my mom, THANKS MOM) Same goes with nail polish remover. Wash those toxins off as quickly as possible! However, do not soak your hands in the water for a long period of time. Water makes your nails swell. When they are dry again, they will shrink. If you put the nail polish on while they are still even a tad bit wet, they will chip when dry. I usually wait about 5 min. after washing my hands to start applying new polish so that it gives my nails some time to dry.
If necessary, this is the time to use that great Sally Hansen cuticle remover that I talked about in my last post to soften up those cuticles and push them back. After I have waited for my nails to dry off, I then apply a base coat. This is where we get into the nitty gritty of nail polish application. Starting in the middle of your nail, do one smooth stroke then two on the sides. Come as close to the cuticle as possible without touching it. If you get nail polish under the cuticle it looks bad, and as your nail grows out, it may create some flaking near this line.

See that lighter line along the center of my nail in the cuticle? That is what you do not want. I came too close to the cuticle and the polish bled under it
If you do this by accident, you can take a thin paintbrush or nail art brush, dip it in polish remover and then run it along the edge of the nail where you made the mistake. This will remove it. It is best to do this right away while the polish is still wet.

Use the nail brush just like this

This is me capping my ends.
Next, move on to your color coat. Same process here. Thin coats, cap the ends. Don't touch the polish brush directly to your cuticle. I usually only do 2 coats of color, unless the color is too translucent and I am trying to cover up streaking. If the polish gets too thick, it is going to peal right off. Do the same steps with the top coat. One thin coat, cap the ends. Top coat is essential to make your manicure shiny, cover up any unevenness in the color, and to make it last longer. If there are any mistakes you can again use that thin paintbrush to get excess polish off your skin. Make sure you wait for all polish to dry between coats, usually about 10-15 min so that your manicure doesn't get ruined when you touch things.
When you are done, remember to wash your your hands again. Then use some moisturizer, like cuticle oil, or that great J.R. Watkins hand and cuticle salve that I talked about in my last blog.
Does anyone else have any tips or tricks to make your manicures last longer?
Saturday, July 7, 2012
Favorite nail and hand care products
Hello everyone! I hope you enjoyed my first post.


As many of you know, I work in the healthcare field. That means that I am washing my hands or using alcohol based hand sanitizer at least 30 times a day, if not more. All that washing and alcohol can make skin and nails very dry. So, how do I keep my hands and nails looking beautiful? I have several tips to share with everyone. My first secret to getting strong nails is.....

Thats right, prenatal vitamins. If you want to look healthy, you actually have to BE healthy. I have been taking prenatal vitamins for the past 3-4 months, and they make my nails (and hair) grow faster, longer, and stronger.

My second secret for healthy nails and healthy cuticles is J.R. Watkins hand and cuticle salve. I love this stuff. I put it on constantly. It is super greasy and super moisturizing. It stays on your skin much longer than regular old hand lotion. I feel like it creates a barrier between my skin and those awful hand sanitizers I am constantly using, which means it keeps my hands from becoming a chapped mess. I also put it on my feet at night before I go to bed. It is also all natural, which I love. You can buy it online here J.R. Watkins Apothecary. I don't buy mine online because I don't want to pay shipping and handling, so every few months I make my boyfriend drive an hour to take me to the nearest Cracker Barrel so that I can stock up. They sell all kinds of cool stuff in their little shops, including this.

My third secret is proper cuticle care. Never cut your cuticles, ever! When my cuticles are looking a little overgrown, I just apply a little dab of Sally Hansen Cuticle Remover and let them sit for a few min. This product is nice because the tip is actually angled, and can also work as a cuticle pusher to push them back after they have been softened up a little. Even when I go to the nail salon, I never let them cut my cuticles with a cuticle nipper. Thats how you get nail infections!

My last secret to getting healthy nails is using the proper nail file. Generally I keep my nails on the fairly short side because of my job. Long nails means lots of extra places for bacteria to get stuck. When my nails get too long, I cut them with nail clippers, then I file them with this Revlon crystal nail file. Crystal nail files are supposed to reduce splitting and pealing of nails by providing a smoother edge than metal or emery board files. They are also more hygenic, as they are not porous and therefore do not contain all those little spaces for bacteria and fungus to get trapped. Crystal nail files also generally last much longer than other types of nail files, so although they may cost more upfront, you wont need another file for at least a year.
What do you think of my nail care routine? Do you have any products you love to use? What are your secrets to healthy nails and hands? Tell me in the comments!
My first post... Fruit Stripe Gum Nail Art
Hello everyone!


Thanks for visiting. This is my first post ever, on my brand new nail polish blog. I have loved nail polish since I was a child, but over the past few years my nail polish obsession has grown to a new level. This is my way to share my love of polish with all of you!
Do you remember Fruit stripe gum? If you grew up in the 90's, I bet you do. You know, it came in a package with a zebra on the front and temporary tattoos on each of the wrappers? We all know the only reason we loved it so much was because of those tattoos. It certainly wasn't because of the flavor, because that only lasted for about 20 seconds. My manicure today was inspired by Zebra Stripe Gum.


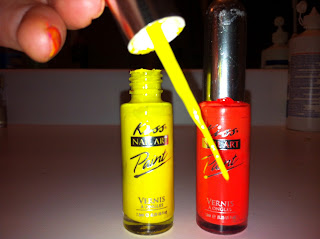
For this manicure, I started by using Revlon Quick Dry Base coat, which I have been using as a base coat for all my manicures lately. My base color was Ulta OH! I then used two of my Kiss Nail Art Stripers in Neon Orange and Beach Yellow to draw stripes on the nails. I also used a nail art paintbrush from Sallys Beauty Supply to turn Revlon Top Speed Guava and 10 #407 into stripes as well. I finished off with the Revlon Quick Dry Top Coat.
Is case anyone is wondering what Kiss Nail art Stripers are, these are them. They come in a thin bottle with a very narrow brush, perfect for nail art. I bought them before I discovered that you could just buy the nail art brush at the beauty supply store and clean it off with polish remover and use it with any polish.

Subscribe to:
Posts (Atom)