
For this nail art design, you will need the following:
black polish
white polish
dark blue or dark purple polish
gold polish
copper polish (optional)
silver glitter polish
makeup sponge
water
1. First of all, paint a base coat on your nails. Follow by painting a black base. Make sure your polish is completely dry.
2. When polish is completely dry, take your makeup sponge and dip it in water. Squeeze out most of the moisture. Paint thin line of white polish on makeup sponge.
3. Dab makeup sponge on paper towel several times. Then, dab on your nail. Do not cover entire nail, just a small portion.

4. Take makeup sponge and paint over white polish with copper polish. Again dab onto nail in center of white polish. Do not cover entire white portion. Repeat with gold polish

5. Dab around edges of "galaxy" with blue polish to soften edges and blend into black.
6. (Optional) use white dotter tool to make small stars with white polish.

7. Finish with layer of silver glitter and top with top coat.
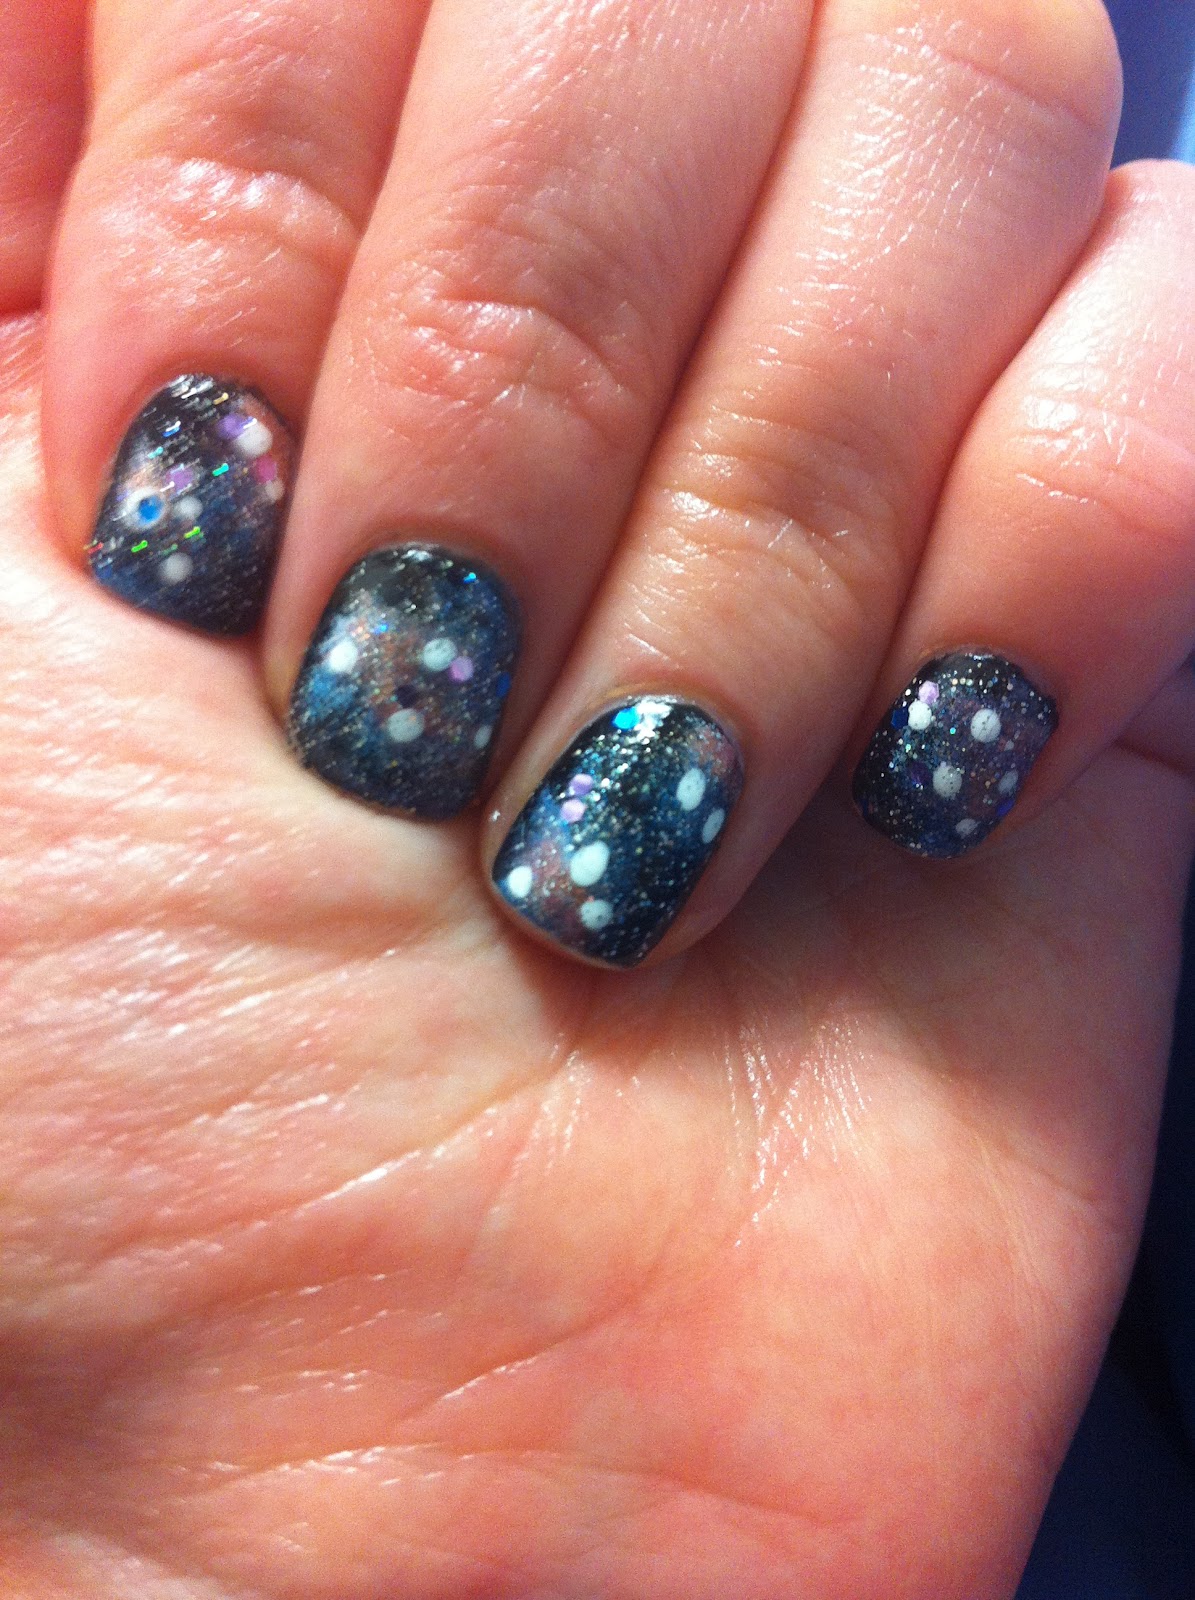
Do you think you will try this trend? It looks way cooler in person!

